
Olive Garden Breadsticks are light, airy, chewy, and covered in garlic butter. They are perfect for dipping in soup or pasta and served with a salad!
Olive Garden Breadsticks Recipe
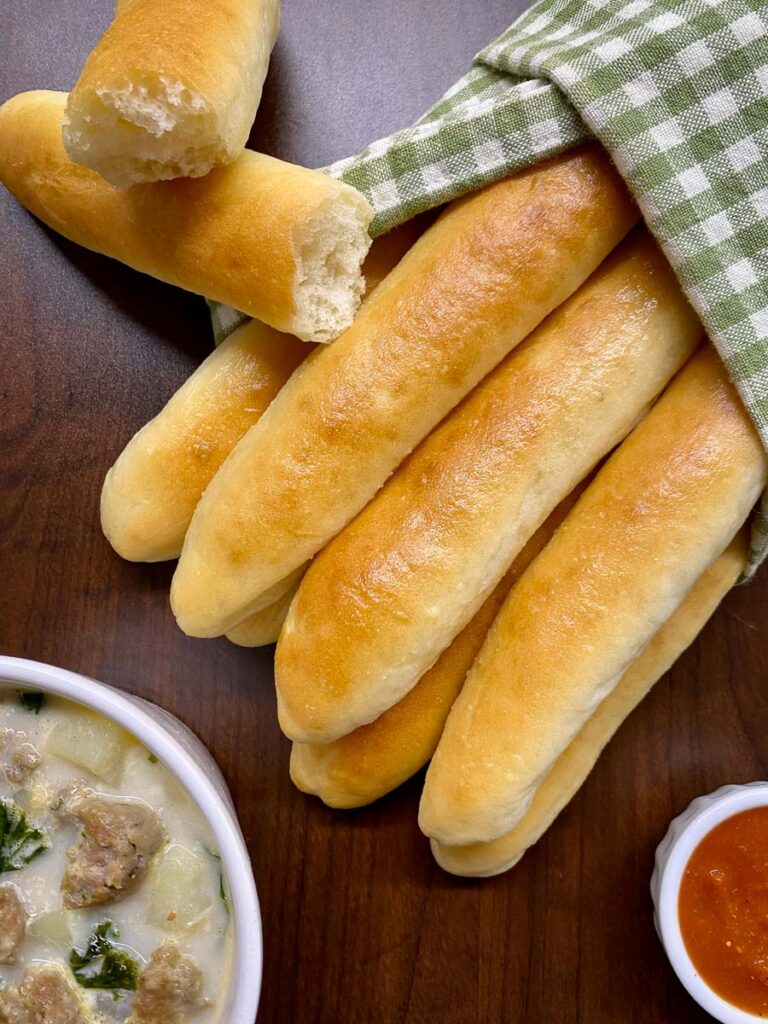
It is no secret that Olive Garden has the most famous and amazing breadsticks... but we can make them even better at home! They are so light and airy, yet crispy on the outside and chewy on the inside. Covered in a garlic butter they are simply divine!
Being in Canada I don't have the pleasure of stopping in at Olive Garden whenever I like. Instead, I make my own Olive Garden copycat recipes at home! These breadsticks are just as good, if not better, than the restaurant. You can control exactly what goes in them and you can make your own Olive Garden AYCE soup, salad and breadsticks lunch or dinner at home!
What are Olive Garden Breadsticks?
Olive Garden Breadsticks are quite possibly the most famous (and delicious!) breadsticks ever. The restaurant is known for their endless supply breadsticks, soup and salad. Breadsticks are just as they sound... bread in the shape of a stick! But for some reason something so simple is so delicious and fun.
These are not your average breadsticks. They are covered in a garlic butter that adds just the right amount of flavor to the bread. They are perfect for dipping in soup, pasta, chili and stews. Not only are they delicious, they are also so easy to make.
What to Serve with Olive Garden Breadsticks
For an Olive Garden style dinner at home pair these amazing copycat breadsticks with:
- Olive Garden Stuffed Mushrooms
- Olive Garden Chicken Gnocchi Soup
- Olive Garden Zuppa Toscana
- Olive Garden Salad and Dressing
- Olive Garden Chicken Scampi
Dipping Sauces for Olive Garden Breadsticks
Breadsticks are amazing on their own or served with soup, pasta or chili to dip but you can also serve them as an appetizer with a dip:
- Garlic Alfredo Sauce (try my homemade recipe!)
- Marinara Sauce
- Spicy Ranch (add a splash of hot sauce to ranch dressing)
- Ranch Dressing
- Pizza Sauce
- Honey Mustard
- Olive Oil mixed with balsamic vinegar

What is in Olive Garden Breadsticks?

- Flour - the base of the breadstick dough is flour. Regular all purpose flour works great.
- Olive Oil - olive oil keeps the dough moist.
- Active Dry Yeast, Sugar, Warm Water - yeast is what makes the dough rise. The yeast is proofed or activated in warm water with sugar.
- Honey - a little bit of honey adds a subtle sweetness to the breadstick dough. The sweetness pairs well with the salty garlic butter topping.
- Salt - a small amount of salt is mixed into the dough.
- Garlic Butter Topping
- Butter - melted butter is brushed over the tops of the baked breadsticks.
- Garlic Powder - garlic powder rather than fresh minced garlic is used. Since the garlic butter does not get baked on the breadsticks, the fresh garlic would remain raw. Instead, the garlic powder adds the perfect amount of garlic flavor without a raw overpowering flavor.
- Salt - a little bit... or a lot of salt is added into the garlic butter. If you have had Olive Gardens breadsticks you know they are very salty. Making them at home means you can control how much salt goes into your garlic butter recipe.

How to Make Olive Garden Breadsticks
Full Printable Recipe at Bottom of Page

Prepare the Dough
1 Note: this recipe can be made in a stand mixer or mixed by hand in a large bowl.
2 In the bowl of a stand mixer add the warm water, yeast and sugar. Give it a quick stir and allow to rest for about 5 – 10 minutes, or until all yeast has puffed up/frothed.
3 Add in the olive oil and honey. Give it a quick stir.
4 Add in half the flour and all of the salt. Using the dough hook (or by hand with a spoon), mix on medium low speed until the dough just starts to come together.
5 Add in the remaining flour, mix for about 5-7 minutes on medium low speed until a smooth dough ball forms. Stop the mixer and scrape down the sides of the bowl as needed. The dough ball will pull away from the sides of the bowl but will still be slightly sticky.

Rise and Shape the Dough
1 Transfer the dough ball to a large greased bowl and cover with plastic wrap that has been sprayed with cooking spray to prevent sticking. Let rise in a warm draft-free location (ex. oven, not turned on) until doubled in size, about 30-40 minutes.
2 Preheat oven to 425°F. Line two sheet pans with parchment paper.
3 Remove the plastic wrap from the dough bowl. Use your fist to punch down the dough and turn the dough out onto a lightly floured surface (ex. kitchen counter). Tip: lightly flour your hands so the dough does not stick to your hands.
4 Use your hands to gently flatten the dough into a large rectangle. Slice the dough into 16 even portions. Roll the dough into 8-9 inch breadsticks and set on a sheet pan. Cover with plastic wrap loosely and let rest for 10 minutes.

5 While dough is resting, make the garlic butter. Mix together the melted butter, garlic powder and salt.
6 Bake the breadsticks for 8-10 minutes on the middle oven rack, or until golden brown. In the last minutes of cooking keep an eye on the breadsticks to ensure they do not get too brown. Every oven bakes differently so be sure to check the breadsticks for your preferred brownness.
7 Remove from the oven and brush immediately with garlic butter. Serve warm and enjoy!

Tips for the Best Olive Garden Breadsticks
- Yeast - be sure to allow the yeast enough time to proof. Ensure the water is warm to the touch. Then add in the yeast and sugar. Give it a little stir and let it sit. The yeast will naturally puff up on it's own. Once you see that all, or almost all, of the individual pieces of the yeast have puffed up, it is ready to use. To ensure the yeast is able to proof, make sure your kitchen is not too cold. If it is too cold or if there is a window open with a breeze coming in, the temperature of the water will cool down and the yeast will not rise properly.
- Rising Times - for the best light and airy breadsticks be sure to allow the dough the proper rising time as per the recipe. There are some things you can rush in a recipe, such as cutting down the marinating time for meats or cutting down the cooling time before biting into a fresh baked cookie (LOL!), but one thing you cannot rush is rising times! The dough needs enough time for the yeast to properly rise the dough. If you rush, shorten or skip the rising times you will be left with hard and dense breadsticks.
- Shaping - when shaping and handling the dough, try to handle it as little as possible. The less you roll and shape the dough the better the end result will be. If you over roll or over stretch the dough it will become tough and overworked. The resulting breadsticks will not be light and airy, they will be dense and hard.
- Garlic Butter - this recipe calls for a 3 ingredient garlic butter (melted butter, garlic powder and salt). If you would prefer to use a store bought garlic butter you definitely can. Just melt the garlic butter in the microwave or stove top and then brush over the cooked breadsticks.

FAQs Olive Garden Breadsticks
Store the cooled breadsticks in an air tight container or Ziploc bag at room temperature or in the fridge for up to 3-4 days.
Yes! I love making 2 batches of breadsticks, one for dinner and one for the freezer! Transfer the cooked and cooled breadsticks to a freezer safe container or Ziploc bag. Freeze for up to 3 months. Reheat from frozen by wrapping the breadsticks in foil and baking in the oven at 350°F for about 8-10 minutes, or until warmed through. You can brush with additional garlic butter after reheating if desired.
To reheat, wrap the breadsticks in foil. Bake in the oven at 350°F for about 5 minutes. If you prefer crispy breadsticks, in the last minute of reheating remove the foil to toast the tops of the breadsticks. You can brush with additional garlic butter after reheating if you desire.
Yes! These breadsticks are perfect for make ahead. Follow the recipe as per usual and store the breadsticks in an air tight container or freeze them. Then reheat in the oven and enjoy!
This recipe is naturally vegetarian.
For vegan breadsticks swap the honey for agave and use a vegan butter or dairy free margarine for the garlic butter.
For dairy free breadsticks swap the butter for a vegan butter or dairy free margarine.

Looking for More Easy Bread Recipes?
Enjoy!
- Sab
Disclosure: I only recommend products I would use myself and all opinions expressed here are my own. This post may contain affiliate links that at no additional cost to you, may earn me a small commission.

Olive Garden Breadsticks Copycat
Equipment
Ingredients
Dough Ingredients
- 1 ¼ cup water (warm (110 - 115 degrees), warm to the touch)
- 2 ¼ teaspoon active dry yeast
- 1 teaspoon sugar
- 2 tablespoon honey (or agave for vegan recipe)
- 3 ½ cups all-purpose flour (scoop and level to measure)
- 1 teaspoon salt
- 3 tablespoon olive oil
Garlic Butter Topping
- 5 tablespoon butter (unsalted, or vegan butter substitute (ex. margarine))
- ½ teaspoon salt (or to taste)
- ½ teaspoon garlic powder
Instructions
- Note: this recipe can be made in a stand mixer or mixed by hand in a large bowl.
- In the bowl of a stand mixer add the warm water, yeast and sugar. Give it a quick stir and allow to rest for about 5 – 10 minutes, or until all yeast has puffed up/frothed.
- Add in the olive oil and honey. Give it a quick stir.
- Add in half the flour and all of the salt. Using the dough hook (or by hand with a spoon), mix on medium low speed until the dough just starts to come together.
- Add in the remaining flour, mix for about 5-7 minutes on medium low speed until a smooth dough ball forms. Stop the mixer and scrape down the sides of the bowl as needed. The dough ball will pull away from the sides of the bowl but will still be slightly sticky.
- Transfer the dough ball to a large greased bowl and cover with plastic wrap that has been sprayed with cooking spray to prevent sticking. Let rise in a warm draft-free location (ex. oven, not turned on) until doubled in size, about 30-40 minutes.
- Preheat oven to 425°F. Line two sheet pans with parchment paper.
- Remove the plastic wrap from the dough bowl. Use your fist to punch down the dough. Turn the dough out onto a lightly floured surface (ex. kitchen counter). Tip: lightly flour your hands so the dough does not stick to your hands.
- Use your hands to gently flatten the dough into a large rectangle. Slice the dough into 16 even portions. Roll the dough into 8-9 inch breadsticks and set on a sheet pan. Cover with plastic wrap loosely and let rest for 10 minutes.
- While dough is resting, make the garlic butter. Mix together the melted butter, garlic powder and salt.
- Bake the breadsticks for 8-10 minutes on the middle oven rack, or until golden brown. In the last minutes of cooking keep an eye on the breadsticks to ensure they do not get too brown. Every oven bakes differently so be sure to check the breadsticks for your preferred brownness.
- Remove from the oven and brush immediately with garlic butter. Serve warm and enjoy!
Video
Notes
Nutrition

Leave a Reply